
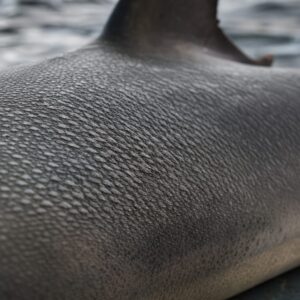
Run your hand along a shark's skin from tail to head – against the grain, as it were – and it will cut you. The same skin stroked nose to tail feels almost smooth, like fine wet leather. Fishermen knew this long before materials scientists did. That's why they called it shagreen and used it to sand wood, long before anyone thought to glue crushed minerals onto paper. The shark, entirely unbothered, had already solved one of the trickiest problems in manufacturing: how to tear a hard surface down without just bashing it.
The answer, it turns out, is all in the teeth. Not the big dramatic ones in the jaw, but the thousands of microscopic ones covering every square centimetre of skin.
What a Shark's Skin Actually Is
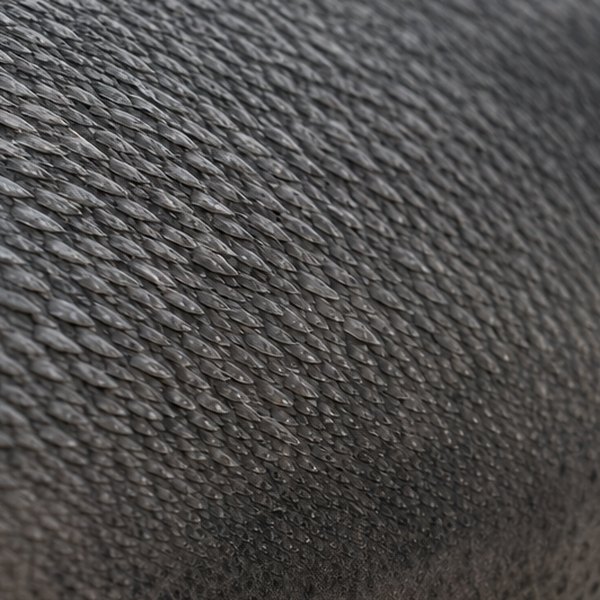
A shark's scales aren't scales in the way a fish's are. They're called dermal denticles, and each one is structurally closer to a tooth than a tile – with a pulp cavity, a dentine layer, and a hard enamel-like surface. All of them are aligned in the same direction, tip pointing toward the tail, which is what gives the skin that one-way quality. Stroke with the denticles and the tips lie flat. Go against them and you're dragging a field of tiny blades across your skin.
This directionality is the thing. The denticles don't just abrade randomly; they channel pressure and friction into controlled, consistent micro-cuts, all pointing the same way. Modern abrasive engineers still spend considerable effort trying to replicate that alignment synthetically – electrostatically orienting abrasive grains on a belt so that more cutting edges face upward rather than lying flat and just burnishing the surface. That's a whole field of engineering that a cartilaginous fish sorted out through evolution several hundred million years ago.
Why Grit Tears Rather Than Scrapes
This is the bit that most people get slightly wrong when they think about how sandpaper works. It feels like scraping, but what's actually happening at a microscopic level is tearing. Each abrasive grain – whether it's aluminium oxide, silicon carbide, or garnet – is a jagged, irregular lump with edges that cut in much the same way a denticle does: by ploughing a tiny furrow and shearing away a chip of material. The grain catches, bites, and the material fractures rather than being pushed along.
This is also why the grit numbering system runs backwards from intuition. A 40-grit paper has big, coarse grains with large gaps between them – vicious little teeth that take big bites and leave deep scratches. An 80-grit paper has more grains per square inch, each one smaller, taking smaller bites. By 400-grit, the "teeth" are so fine you're almost polishing rather than abrading; the furrows they leave are too small to see and too shallow to feel. The number refers to the mesh size used to sort the grains – how many openings per inch the sieve has – so the higher the number, the tinier the particle that slips through.
Why You Sand With the Grain (And What Happens When You Don't)
The grain of wood isn't just a decorative pattern; it's a physical structure of long fibres running in one direction. Sand with those fibres and your abrasive is cutting across the tips of them cleanly. The scratches run parallel to the grain, get hidden by it, and largely disappear under a finish.
Sand across the grain – or, worse, in circles – and you're dragging abrasive grains sideways across those fibres, tearing them rather than cutting them. You leave visible cross-scratches that catch the light, especially under paint or varnish. Finishing a table in circles with 120-grit paper and then wondering why the painted surface looks terrible is one of the more reliable DIY disappointments. It's essentially the same mistake as running your hand the wrong way along shark skin. You're fighting the grain instead of working with it.
For ideas on turning a spare corner into a proper workspace, How to create a WFH office without losing a bedroom at perkypad.co.uk is worth a look before you reach for the drill.
The Right Order of Battle
Start coarse, work fine. A rough surface needs a coarse grit to level it quickly – starting with 240-grit on bare rough timber is like trying to mow a field with nail scissors. Get the big work done with 80 or 100, then step up through 120 and 180, finishing at 240 if you're painting, or higher if you're oiling or varnishing and want a smooth, close finish. Each stage removes the scratches left by the last.
The shark figured all of this out without a single trip to a DIY shop. Which, is quite impressive for something that's also occasionally trying to eat you.
Questions this raises
- How is modern sandpaper grit actually made?
- What grit should you start with on bare timber?
- Why does sanding against the grain damage wood?
- Is shagreen still used for anything today?